

 24/7 Emergency Service
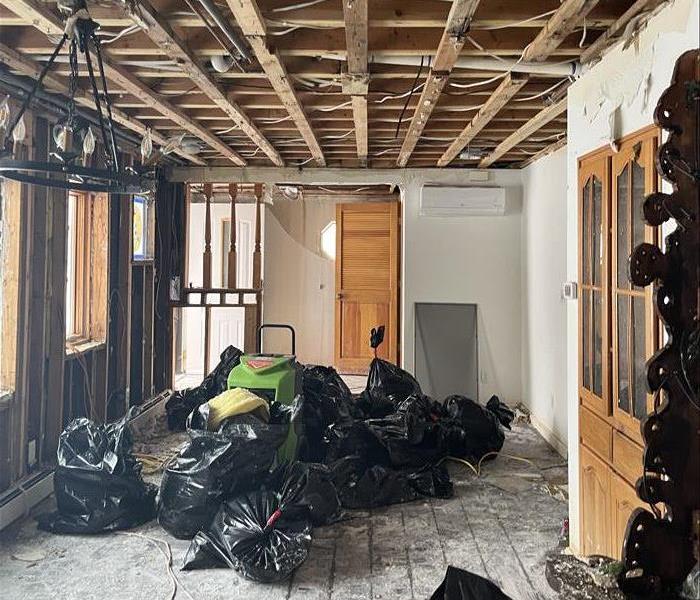
Taking Photos of Your Damaged Property for Insurance 101: A Step-by-Step Guide
3/12/2025 (Permalink)
 When disaster strikes, documenting property damage correctly and thoroughly ensures a smooth insurance claims process.
When disaster strikes, documenting property damage correctly and thoroughly is crucial for ensuring a smooth insurance claims process. Taking clear, detailed photos of the damage helps insurance adjusters assess the situation accurately, potentially speeding up claim approval and maximizing your coverage.
If you’re wondering how to take photos of your damaged property for insurance claims, this guide will walk you through best practices to ensure you capture the necessary evidence effectively.
Why Are Photos Important for Insurance Claims?
Photos provide undeniable proof of the damage sustained by your property. Insurance adjusters rely on these images to assess the extent of damage, validate claims, and determine repair costs. Without proper documentation, there’s a risk of delays, underpayment, or claim denial.
Key Reasons to Take High-Quality Photos for Your Insurance Claim:
- Provides visual proof of the damage, preventing disputes over the claim.
- Helps adjusters estimate repair costs without needing immediate on-site visits.
- Ensures that all damages are documented before any cleanup or repairs take place.
- Strengthens your case if disputes arise regarding the extent of the damage.
How to Take Photos of Your Damaged Property for Insurance
1. Start with Wide-Angle Shots
- Begin by capturing wide shots of the entire damaged area to provide context.
- Take photos from multiple angles to ensure a complete visual record.
2. Capture Close-Ups of Damage
- Zoom in on specific damage, including cracks, broken materials, water stains, charred areas, or debris.
- Make sure the details and textures of the damage are visible.
3. Take Photos Before Moving Anything
- Document the scene before making any temporary repairs or removing debris to ensure the full extent of the damage is recorded.
4. Photograph Serial Numbers and Labels
- For damaged appliances, electronics, or furniture, take clear images of model numbers, serial numbers, and purchase receipts if available.
5. Document Water Levels and Smoke Residue
- If water damage occurs, take photos of waterlines on walls, floors, or furniture.
- If fire damage occurs, capture soot stains, smoke residue, and charred materials.
6. Take Exterior Photos (If Applicable)
- For storm, fire, or vandalism damage, take pictures of:
- Roof damage (missing shingles, fallen trees, broken gutters).
- Windows and doors (shattered glass, dents, or entry points of damage).
- Driveways, fences, or landscaping impacted by the event.
7. Use Good Lighting and Avoid Shadows
- If possible, take photos during daylight hours to ensure clarity and detail.
- Use a flashlight or your phone’s flash in darker areas, like basements or attics.
8. Record Videos for Extra Documentation
- Take a slow, steady video walkthrough of the affected area to provide additional context.
- Narrate key details while recording, such as the date, cause of damage, and affected areas.
9. Organize and Back Up Your Photos
- Create a digital folder for your claim and categorize images for easy reference.
- Upload your photos to cloud storage (Google Drive, iCloud, or Dropbox) to prevent loss.
10. Time-Stamp and Date Your Images
- Many smartphones automatically embed time and date stamps into images.
- If necessary, enable the timestamp feature in your camera settings or add date labels manually.
Frequently Asked Questions About Taking Photos for Insurance Claims
Q: Should I take photos before calling my insurance company?
A: Yes, it’s always best to take thorough photos before filing a claim. The more visual proof you have, the stronger your claim will be.
Q: How many photos should I take?
A: It’s better to take more photos than not enough. Capture every angle, zoom in on details, and provide wide shots to give a complete picture of the damage.
Q: What if I forget to take a photo of something?
A: If you notice missing details later, take additional photos immediately before cleanup or repairs begin.
Q: Do insurance adjusters require professional-quality images?
A: No, but clear, well-lit, high-resolution photos improve your claim’s accuracy. Avoid blurry or unclear images.
Q: Can SERVPRO® assist with documentation for my insurance claim?
A: Yes! SERVPRO professionals help document damage through photos, detailed reports, and expert evaluations, ensuring your insurance claim is well-supported.
Taking clear, organized photos of your damaged property is one of the most important steps in the insurance claims process. The more visual evidence you provide, the smoother your claim will be.
By following the best practices outlined above, you can ensure an accurate assessment of damages and improve your chances of receiving full compensation for repairs.
Need expert help with property damage cleanup and insurance documentation? SERVPRO is here 24/7 to provide professional restoration services and work directly with your insurance provider.